Quick start
This guide will swiftly take you from downloading RGBJunkie to illuminating your entire desk! For an even deeper dive into all the features, shortcuts, and troubleshooting tips, open Settings → Help in the app — it loads the full Help Center from rgbjunkie.com.
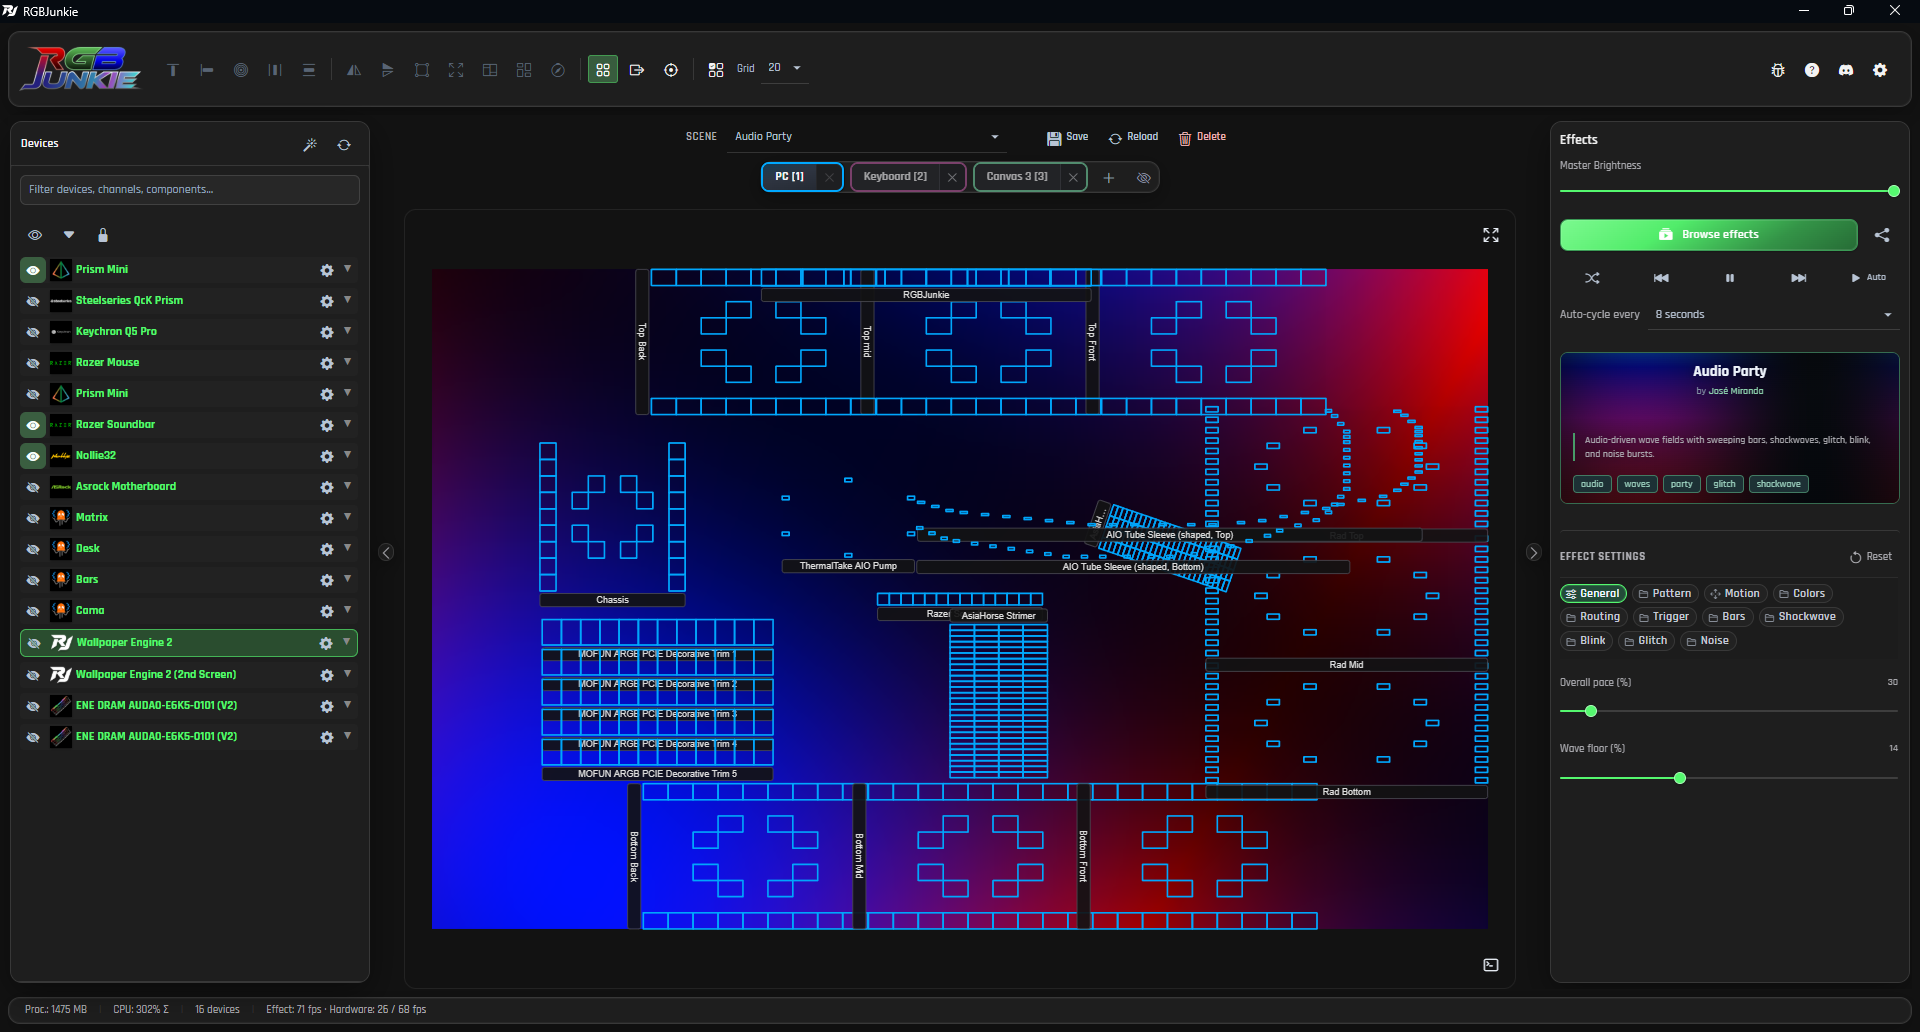 RGBJunkie main interface with Settings
Download and install
- First things first, grab the latest version of RGBJunkie from our official download page.
- Run the installer (or simply unzip the portable build) and then launch RGBJunkie to get started.
- You'll be prompted to accept our Terms of Service – a quick click and you're in!
Windows download warning? Edge or Chrome may say the installer “isn’t commonly downloaded.” Open Downloads (Ctrl+J), choose Keep on the file, then Run anyway if SmartScreen appears. See Windows download and SmartScreen warnings for screenshots.
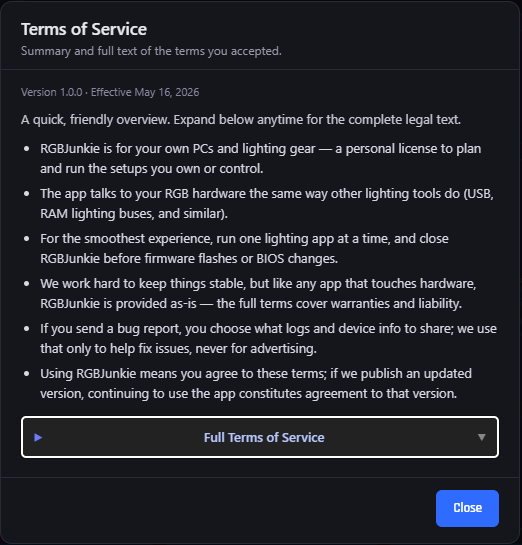 Terms of service window
Tip: Keep your RGBJunkie experience fresh! You can always use Settings → About → Check for updates later to ensure you're running the latest and greatest version. For more details, check out our Check for updates guide.
Know the layout
Devices panel
Everything RGBJunkie sees lives here — USB controllers, WLED you added by hand, virtual devices from plugins. Devices split into channels (one strip, one fan header…), and channels hold components on your canvas — except fixed-layout keyboards and mice, which come pre-mapped.
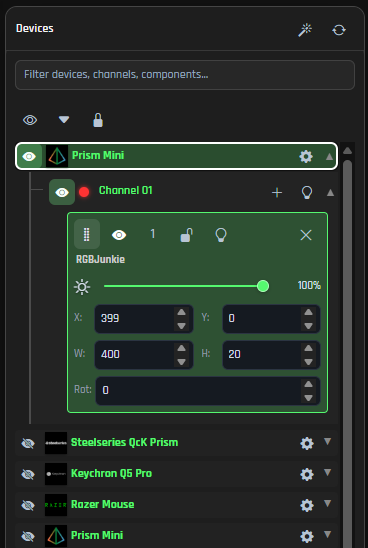 Devices Panel
Canvas panel
Your LED layout, live on screen. The Scene bar and canvas tabs sit in the strip above the workspace. The Devices and Effects panels are collapsible docks — use the chevrons on the panel edges when you need more canvas room.
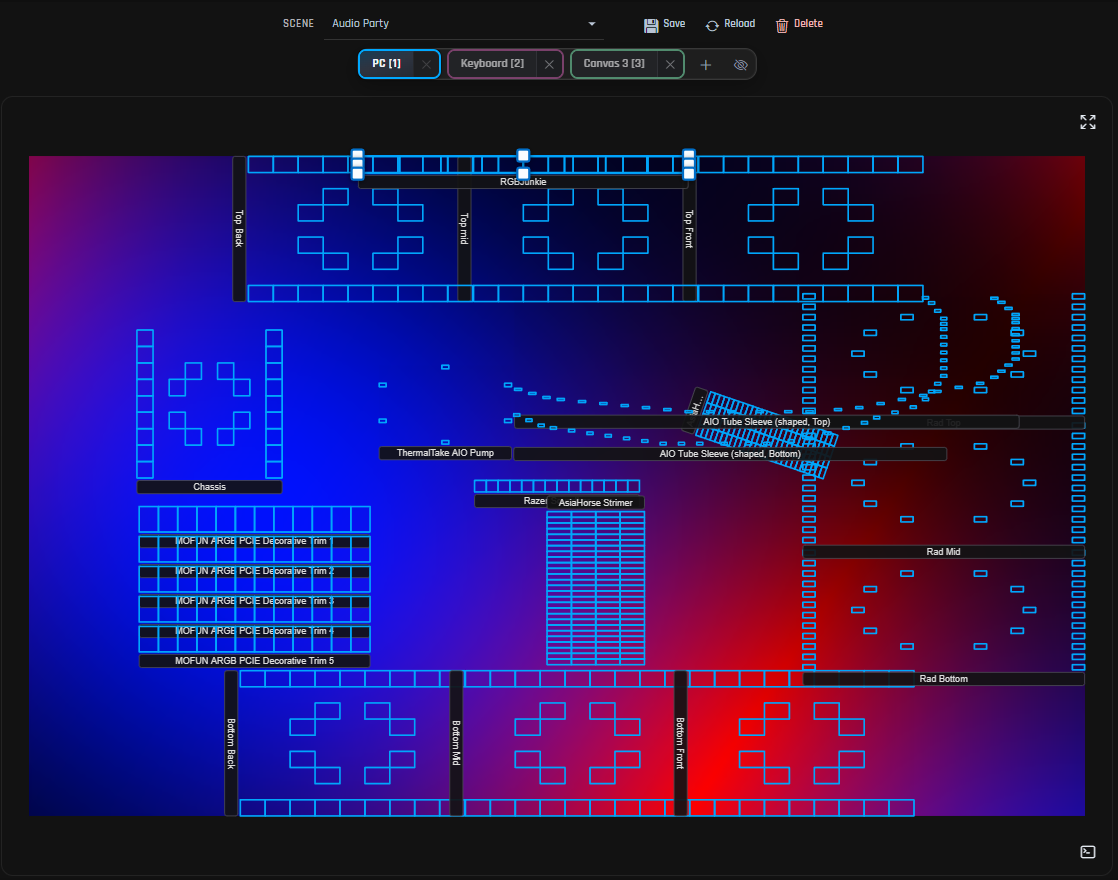 Canvas Panel
Need more room to admire your setup? Feel free to collapse either side panel with a click! The handy fullscreen button on the canvas will maximize your visual preview, letting you see your lighting in all its glory! Just press Escape to return.
Effects panel
This is where the fun is! Browse effects opens the full catalog. Master brightness, transport controls (shuffle, previous, next, pause/play, auto cycle), and per-effect sliders live in the right Effects dock. Effect settings appear below when an effect is running.
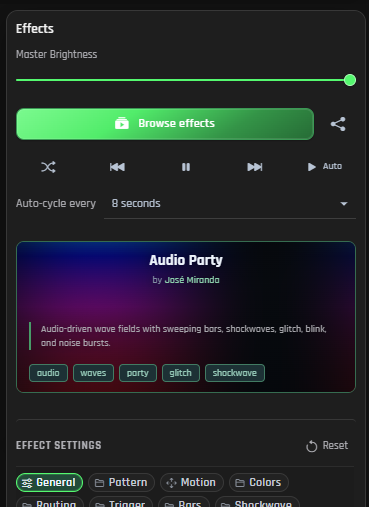 Effects Panel
Connect and set up gear
Time to plug in your awesome USB lighting gear! If a device doesn't appear right away, double-check our supported gear list – we're always expanding it!
- In the Devices panel on the left, you'll see your connected gear. Keep an eye out for any channels that still need a layout assigned.
- For a super quick setup, click the magic-wand button to launch the RGB Wizard. Alternatively, use the + Add button on a channel row to open the Component Library and place your components (LED strips, keyboard zones, and more).
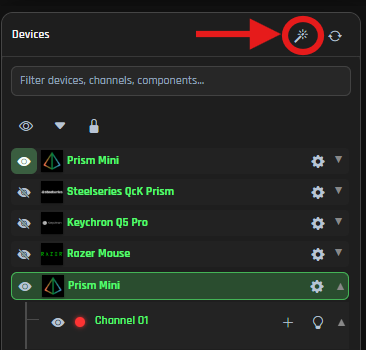 Devices panel showing a device needing setup, with the magic wand button highlighted
The RGB Wizard and Component Library guide you through matching physical LEDs to the canvas preview.
Choose an effect
Head over to the right panel and open Browse effects (or simply pick one that's already part of your current Scene).
- Select an effect that catches your eye! Instantly, a set of settings will appear, letting you fine-tune things like speed, colors, and many other exciting options.
- Watch the magic unfold on your canvas preview! Your connected devices will mirror the changes in real time, bringing your desk to life.
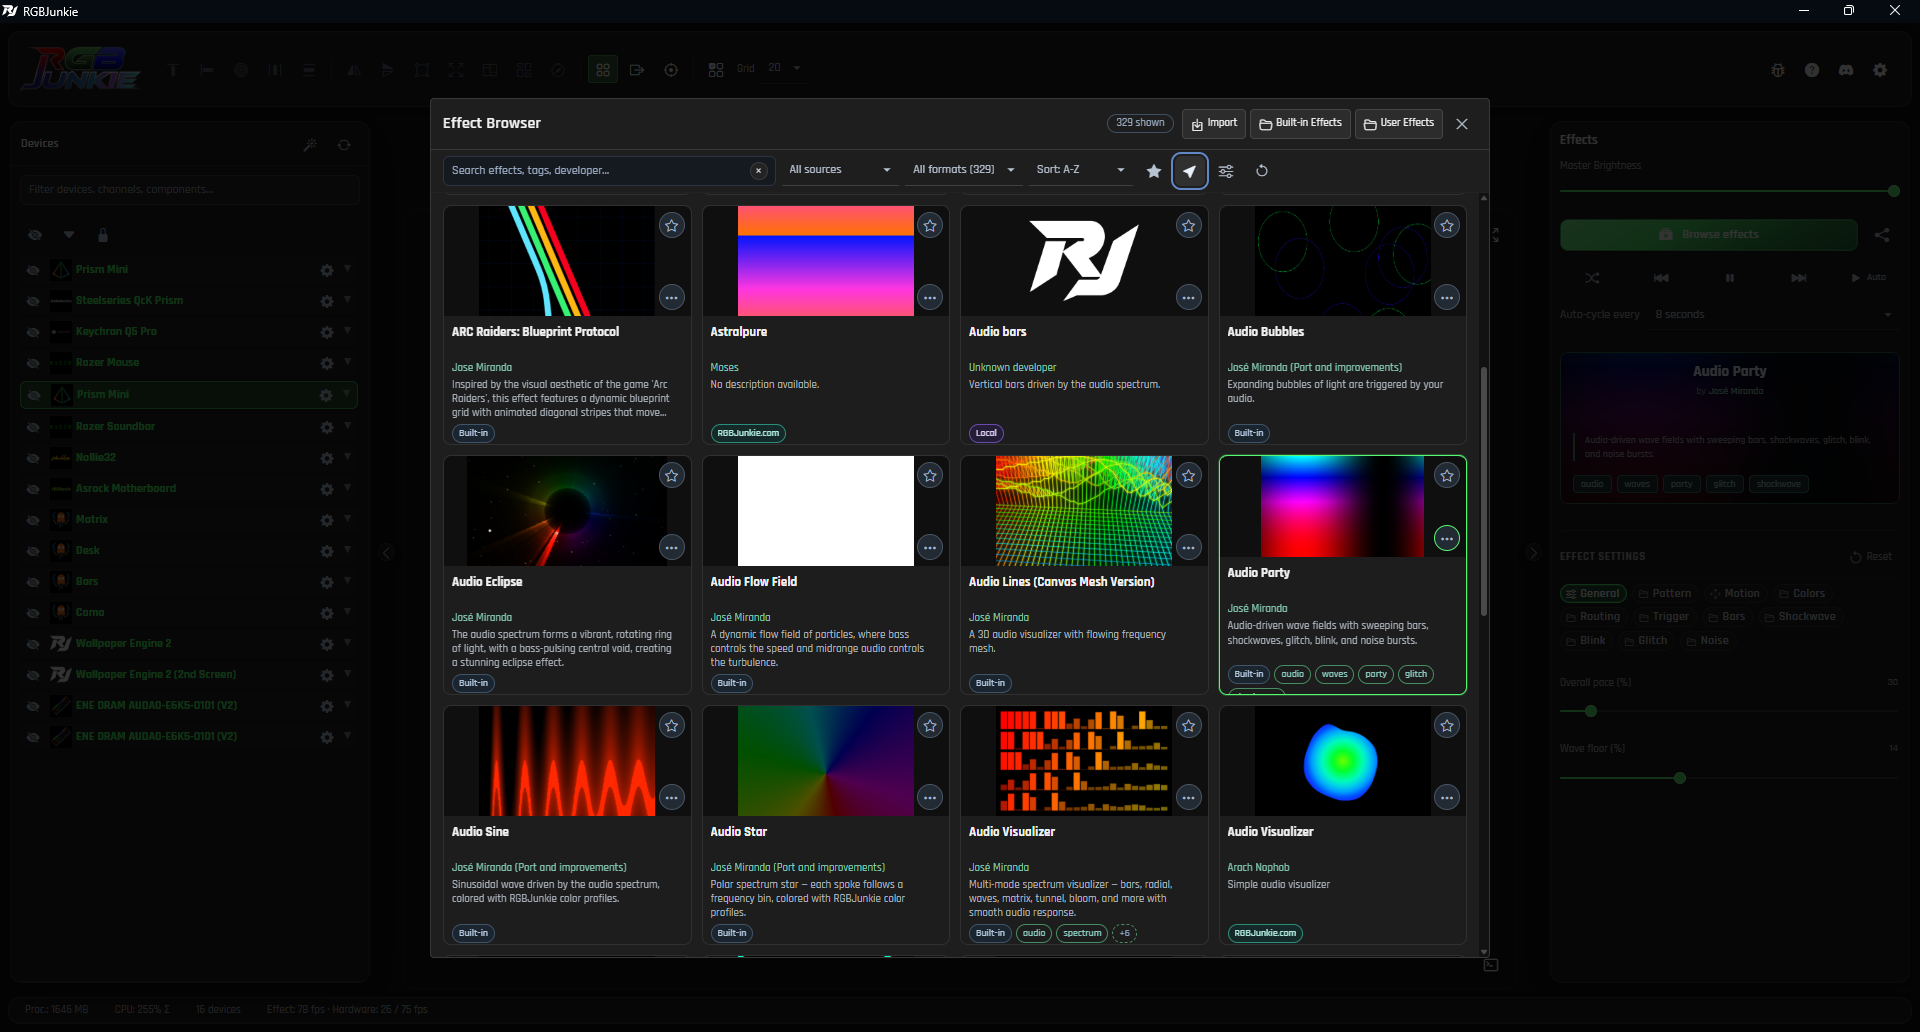 Effects Browser
Play around with the sliders until your lighting looks absolutely perfect! Remember, you can use different canvas tabs to manage distinct lighting zones, like your monitors versus your desk strips, for ultimate control.
Save your first Scene
Think of a Scene as a snapshot of your perfect lighting setup! It cleverly stores your entire layout, canvas tabs, chosen effects, and all your carefully adjusted slider values.
- Once everything looks just the way you want it, click the Save button located in the bar above your workspace canvas tabs.
- Give your masterpiece a memorable name, like
Gamingfor your battle station orWorkfor a more focused ambiance. - You can effortlessly switch between your saved Scenes anytime using the Scene picker in that very same bar.
 Scenes panel
Want to learn more about copying, overwriting, and managing your Scenes like a pro? Check out our dedicated guide on Save and switch Scene profiles.
Where to go next
Dig in wherever you are stuck — or just curious:
Getting your layout right — RGB Wizard, Devices panel, Component Library, Workspace editor, Canvas tabs
Effects and color — Effects — browse and tune, Color profiles, LED Studio
Save and share your work — Scene profiles, Installed files, Backup your data, App links
Network and extras — WLED setup, RAM and GPU lighting, Wallpaper and screen sync, Stream Deck, Tray and startup, Keyboard shortcuts
Something broke? — Supported devices, Troubleshooting — no lights, Troubleshooting — wrong colors, Send a support report
Also worth bookmarking — Settings → Help in the app, Check for updates, the full Help Center, Changelog, and the Effect Builder in your browser
You're all set to dive deeper into the world of RGBJunkie! Remember to save a Scene after each major change – it's your secret weapon for effortlessly jumping between amazing looks without ever having to rebuild your desk's ambiance from scratch.